This post may contain affiliate links, meaning I may receive a commission if you purchase through my links. I only recommend products I have personally tested or have thoroughly researched. All opinions are my own. Please read the full disclosure for more information.
Cleaning supplies can get to be expensive over time, especially if you like to clean frequently. And not only does it get expensive, but many cleaning products have very harsh chemicals in them, with warnings for risk of cancer and other toxins.
So what is the best option to avoid all the bad chemicals? Or how do you switch to safer ingredients for both you and the environment?
And, maybe even save some money, and extend the life of your cleaning stock?
I love making things to use around the house, and especially if it can save a few bucks. It’s so rewarding and I feel a bit more savvy each time I try something new.
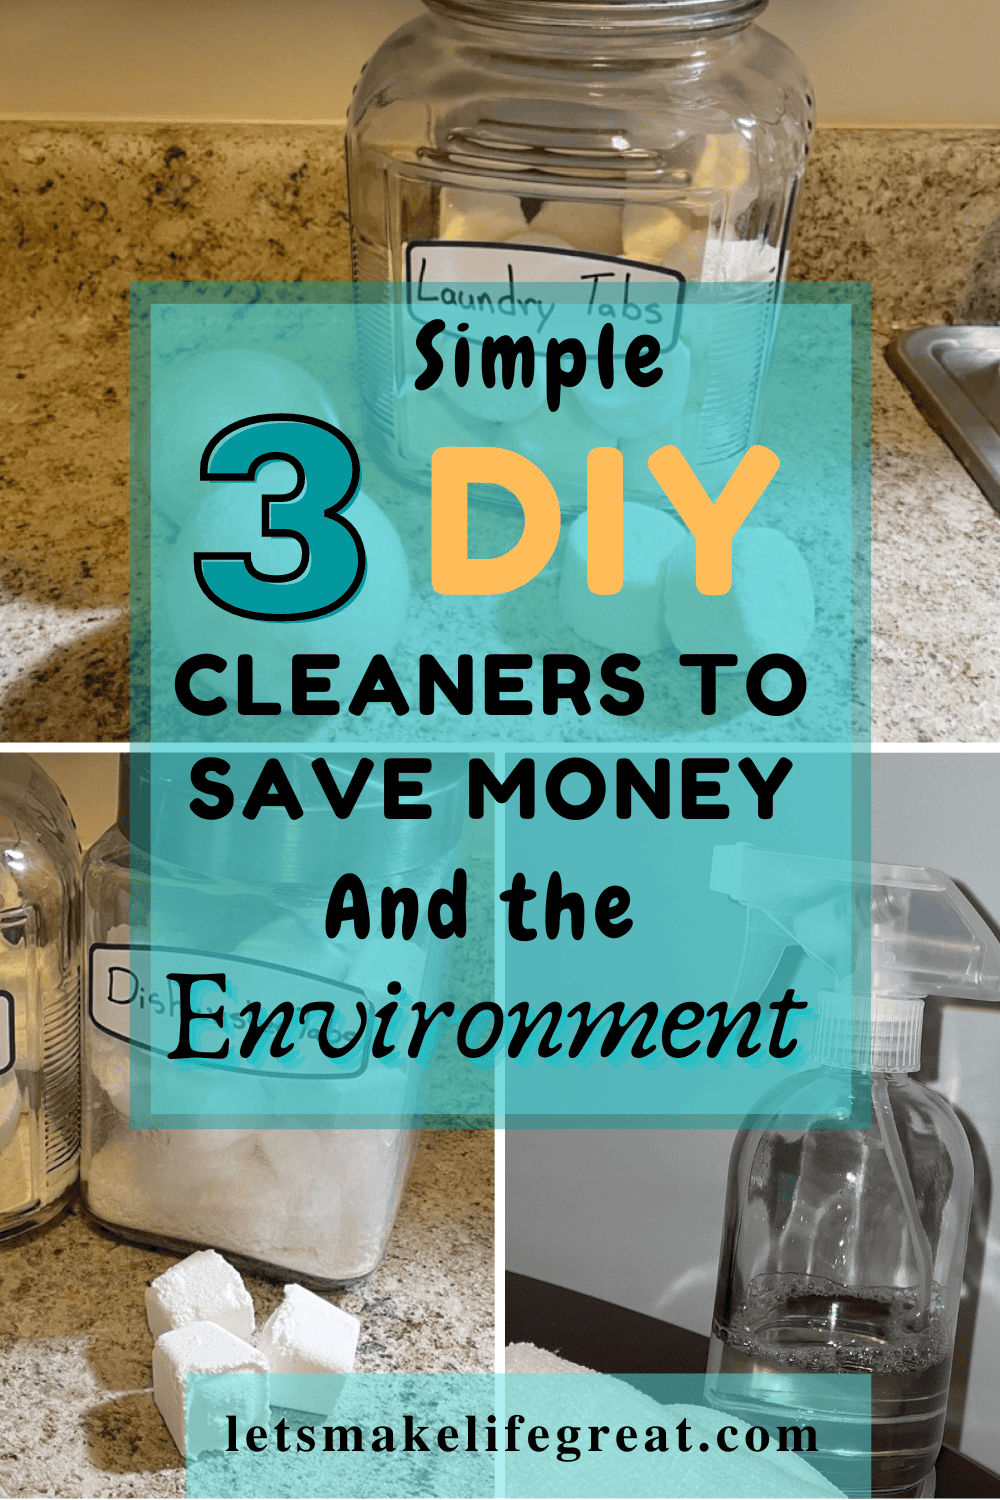
Hopefully, you are the same and enjoy creating new things too. In this post I will talk you through how to make your own multipurpose cleaner, laundry detergent tabs, and dishwasher detergent tabs. So, try out these 3 DIY cleaning supplies that save money and the environment.
1. Multipurpose Cleaner
There are tons of surfaces in your home that can be cleaned by a multipurpose cleaner. This includes the kitchen, the bathroom, the living room, and almost anywhere in and out of the house.
Using Whole Naturals Pure-Castile Soap, you can make your own cleaner as often as you need.
Starting with 1/4 cup of Whole Naturals Pure-Castile Soap, mix the soap with 1 quart of warm water. I recommend stirring this mixture, rather than shaking to mix. This avoids causing unnecessary foaming and incorporates everything smoothly for better results.
Once everything is well mixed, pour your cleaner into a spray bottle and start cleaning away!
And, you can even add this mixture to a spray mop when cleaning your floors.
Why I love Castile Soap
Castile soap is super versatile, very safe on the skin, and even safe to use on your pets.
Its purposes include body wash and hand soap, facial cleanser, shampoo, dish soap, fruit and veggie wash, shaving soap, pet shampoo, multipurpose cleaner (as we are using in our recipe here), and more. I have actually used Whole Naturals Castile for at least half of these uses, and I absolutely love it! It works wonderfully well when shaving, does an excellent job for helping to remove excessive oil and dirt from my face and doesn’t dry out my skin.
If you love foaming hand soap, you’ll love the recipe I use to make it myself. You can check it out here. It’s super simple, and you can make it in about 10 minutes or less.
Whole Naturals is certified vegan and cruelty free, and uses humane and environmentally safe production. This means no herbicides or pesticides, in the biodegradable ingredients used in their product. And, no animal products or byproducts.
Like I said, good for your wallet and the environment.
2. Laundry Detergent
Buying laundry detergent all the time can be costly and bothersome when you have to rinse out the detergent containers to recycle. This is if you are even able to recycle the container at all. Plus, these expensive detergents include synthetic fragrances, unnecessary dyes, and other toxic chemicals that can be carcinogenic.
Instead, you can make your own laundry detergent for significantly less per year, and you’ll know what ingredients are cleaning your clothes. Try out this next recipe for a laundry detergent tab which is convenient to use, easy to make, and just as easy to store away.
And a bonus about this recipe, is that you can use a couple of the ingredients in the next recipe as well!
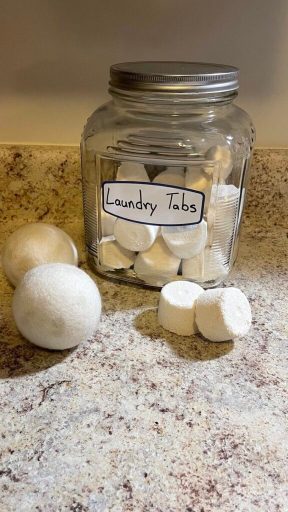
Laundry Tabs
- 1 Fels Naptha bar, or other laundry bar
- 1 cup of Washing Soda
- 1 cup of baking soda
- 1 cup of kosher salt
- up to 40 drops of preferred essential oil (if you want it scented)
- Silicone ice cube trays, or flexible cube trays (for forming tabs)
Before measuring anything, start with grating or grinding your laundry bar. If you have a food processor, you can cut up your bar and place small blocks into the processor to grind it up. Avoid over grinding to prevent excessive dust. If you don’t have a processor you will need to use a cheese grater or carefully grate it with a vegetable peeler. Be careful during this process to avoid accidentally cutting yourself.
Once you have your laundry bar grated into nice small little chunks, or a powder-like consistency, you can continue on with the recipe. If you plan to make larger batches, I recommend grating multiple bars at a time and storing any extra in a dry and clean reusable bag.
Measure out all of your ingredients, and gently mix with a whisk, avoiding excessive stirring to prevent dust. If you are not making tabs and prefer to keep your detergent in a loose powder form, then you are now finished with your recipe. Just put everything into an airtight jar and seal it up. However, I recommend making tabs for later convenience.
Start Mixing!
Once all of the dry ingredients are thoroughly mixed, use a spray bottle filled with just water to lightly moisten your mix. I do not recommend using a spray bottle that has had previous chemicals in it to reduce risk of combining unsafe chemicals together. Start with an unused or water-only dedicated spray bottle.
Avoid over spraying your mix, and stir frequently. This step is a bit tedious but necessary for best results. When I made my last batch I used about 10 spritzes of water at a time before stirring. Avoid over spraying to prevent excessive caking, and for better incorporation of the ingredients.
Continue adding and mixing a little bit of water into your detergent until you can easily form clumps in your hands. It should not be as wet as a sponge, but moist (sorry if you hate that word) enough that it forms solid shapes when pressed together.
At this point, once your mix is able to form into solid, go ahead and add in any essential oils or other scents. Just mix it in using the whisk. I recommend starting with 10 drops per scent at a time, and no more than 40 drops.
The reason I suggest adding the oils in after your mix is hydrated, is to avoid over scenting your mix. In the past I have added the oils in first, couldn’t hardly smell it, and then as soon as I spray water into the mix, the scent hit me hard. I had over scented it without knowing… So Save yourself a little heartbreak, and add any scents in after you add water.
When your mix is thoroughly hydrated you can begin pouring it in to your ice cube trays and packing the mixture tightly into the mold. The mold I used was a bit larger than most ice cube trays and holds 3 tablespoons. One 3 tablespoon tab is perfect for my typical load size. But my laundry loads tend to run a bit larger.
However, if you are using a smaller tray (closer to 2 tablespoons) you may need to use 2 or even 3 tabs.
If you are unsure of your tray size, just use measuring spoons and fill them with water, keeping track of how much you add. Most standard ice cube trays will hold 2 tablespoons, or the equivalent of 1 oz.
How many tabs do I need to use?
The amount of tabs you use per load depends on the load size, how soiled the clothes are, and whether your machine is front loading or top loading. Front loading washers typically use less detergent since they also use less water.
So, just to be safe you may want to start with 2 tabs for a full front loading wash, and up to 3 tabs for a full top loading wash. If you find that 2-3 tabs aren’t enough, try increasing 1 tab at a time. Using no more than 5-6 tabs per wash.
I have found that a single 3 tablespoon tab is perfect for me, with a large load and a top washer.
Related Content
- #1 Easiest DIY Foaming Hand-soap Recipe (step by step)
- How I Save a Ton of Money Refilling my own Ink
3. Dishwasher Detergent
This is another one of those cleaners where the cost really starts to add up over time. Along with tons of plastic bottles and containers. Fortunately, it is also something you can make yourself on a budget.
The recipe that I have been using is best as dry detergent powder.
It can be made for either a grainy powder, or can even be made for tabs. This is a personal preference though, and is easy enough to adjust.
So you won’t need to worry about buying extra ingredients.
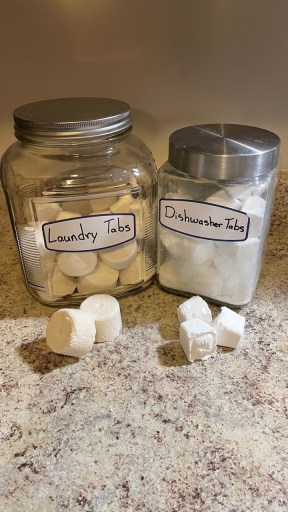
Dishwasher Tabs
- 1 Cup of Washing Soda
- 1 Cup of Baking Soda
- 1/4 Cup of Citric Acid
- 1 Cup of Water
In a large bowl combine all dry ingredients, and using a whisk, carefully mix everything thoroughly. Avoid using an aggressive mixing technique to prevent a dust storm.
Once all ingredients are well mixed, you can either pour into an airtight jar, or keep reading if you want to make tabs.
To make tabs, have all of your ingredients well mixed with your whisk. Using a spray bottle with a fine mist, spray your mixture no more than 10 times before mixing again. Repeat until mixture forms clumps in your hands.
The reason it’s so important to not over hydrate your mixture is to avoid any chemical reaction with the citric acid. Citric acid will bubble up when in contact with water. So when you start to spray your mixture, you will start to hear tiny little popping sounds. Some of your mixture will react, yes. But with only a little bit of moisture, most of it will compact and combine with the other ingredients to make a solid form. AKA, tabs.
If you do not have a spray bottle available at the time you are mixing everything together, you can still make tabs. However, you will have to work much faster when stirring everything together. I would recommend using no more than a 1/4 cup of water in total.
Gently pour a little bit in your mixture, and quickly stir until most of the popping sounds from the citric acid have stopped. Repeat this process until your mixture is thoroughly hydrated.
Thoroughly hydrated means it will form clumps when you squeeze a bit in your hands, hold its form, but not release any water. So it shouldn’t feel like a sponge. If it does, this means you have too much water in the mixture.
Making the Tabs
Once your mixture is hydrated, but not soaking wet like a sponge, you can begin forming the tabs.
Begin forming the tabs by taking your ice cube trays, preferably silicone or silicone bottomed, as this make the process easier. Pour your mix into the trays and compact it all in tightly. Pack until you can’t get any more mixture into the cells.
After you’ve packed all of your mixture, let the trays rest for about 24 hours. The wait time here is mostly dependent on your environment as well. A humid environment will take longer to dry, than a hot and dry environment.
Once all tabs are dried, flip the trays over onto some towels, or even cookie sheets to minimize cleanup. Release the tabs from the trays and place them into your clean, airtight container.
I personally prefer large glass jars and containers since they just look nice to me. Plus, they are less likely to crack and expose your tabs to moisture.
But, if you have some other container that you prefer and have picked out, by all means use that thang!
* side note: in the past I used epsom salt as a water softener, even though I’ve seen recommendations from other DIY recipes to use kosher salt (epsom was all I had at the time). However, I noticed a really annoying film on my dishes that I could wipe off with a finger. This was caused by the salt, because the next batch I made, did not have this at all, and actually cleaned my dishes better overall. If you tend to have really hard water and would like to add this to your recipe, I would recommend sticking with kosher salt, and only adding a little bit to start, so you can adjust your recipe accordingly. Maybe 1/4 cup or less to start.
I have been using these DIY cleaners for quite a while, and really enjoy how well they work and how easy they are to make. I have saved quite a bit of money making them myself. And I feel great knowing that I know what ingredients they include.