
This post may contain affiliate links, meaning I may receive a commission if you purchase through my links. I only recommend products I have personally tested or have thoroughly researched. All opinions are my own. Please read the full disclosure for more information.
Did you know that you can actually make money as a blogger?
Well, it’s true. There are dozens of ways that bloggers have been making money for decades.
Many bloggers start making enough money to quit their 9-5 jobs to work their blogs full-time.
Some of the pro-bloggers who are able to monetize their blogs through various methods are even able to travel the world and live as a digital nomad. Meaning they can make money from anywhere if they have access to the internet.
I won’t lie and say that it’s as easy as it sounds or looks, but it doesn’t have to be impossible or unattainable. Because I am going to walk you through my step-by-step guide to starting a profitable blog in as little as 30 days.
Here’s what you need to do to get started.
How to Start a Profitable Blog in 30 Days
If you want to make money blogging, the best way to do this is to use WordPress.org. WordPress is a website creation platform that you can use to create web pages, write and publish posts, add a store to your site, and much more.
WordPress gives you the freedom to customize your site far more than any other site creator platform. It is also the most trusted blogging platform among thousands of bloggers.
5 easy steps to start a profitable blog:
- Decide what your blogging niche is going to be
- Choose a Domain Name and Web Hosting Services
- Set up your WordPress Blog site
- Start writing your blog posts
- Grow your site traffic and monetize

Free Course: How to Start a Blog in 7 days
Blogging can be one of the best ways to start building passive income on your own time. Whether you like to side hustle a few hours each week, or a few hours every day, blogging is perfect for anyone wanting to become their own boss and quit their day job.
Learn step-by-step, how to launch a blog and make it a success in just 7 days. You will discover the best tools and tips from an experienced blogger to avoid the mistakes that every beginner makes.
Don’t wait to take back your time and start earning passive income by writing about the things you love and enjoy.
1. Choose Your Blog Niche
Choosing what niche you are going to write about can be a little tricky. Finding the right niche for you requires a bit of thought.
You will want to choose a niche that you are very passionate about, so you can avoid burnout. But, you also want to find something that you have some experience, expertise, or authority in. More on that in a second.
⬇️ Pin this for later 📌

What Blog Niche Should I Choose?
Make a list of topics that you are passionate about, and could talk about all day. Try and keep this list under 10.
Once you have made a quick list of your most passionate topics, it’s time to figure out if you have EEAT in those topics.
This means that you will want to have (EEAT) Experience, Expertise, and Authority in the niche that you choose. These characteristics allow you to prove to your audience, and search engines, that you are a trustworthy source.
If you are seen as a trustworthy source, you are going to rank higher in search results, and you will have much more success than other bloggers in your niche who don’t have the same qualities.
Now, you don’t have to have all of these qualities in relation to your niche. You can build these up over time as you blog. However, obviously the more the better.
If you can talk about personal experiences in your blog writing, this is often seen as the best type of content. Both in Googles eyes, and your readers eyes.

Narrowing Down Your Niche
Now that you’ve chosen a niche to write about, it’s time to figure out if it is narrow enough.
Confused? Let me explain.
When it comes to choosing a niche for your blog, you don’t want to write about too broad of topics. This essentially eliminates the whole purpose of having EEAT. You can’t be an expert in everything. At least not in the eyes of your audience.
The best way to narrow down is to focus only on the topics in your field of expertise.
This is the specific niche that you will write about.
Let’s take a quick look at what that might look like.
For example, I write about personal finance. That is my main niche. But, I have focused my content creation process to mostly include topics about side hustles, saving money, making money, and a little bit about financial planning.
What I don’t write about is investing, insurance, taxes, loans, social security, estate planning, etc.
While I may mention these topics in some of my posts, I don’t write content that is solely focused on those topics.
Here’s an example of how to come up with topics within your niche.
Main niche: Food Blogging (Desserts)
Categories: Pastries, Cakes, Pies, Cookies
Is my Niche a Profitable Niche?
Now for the big important question you’re probably wondering. Is my niche profitable?
The simple answer to this is that, in theory, all niches are profitable. If you can sell products or services in that niche then you, as a blogger, can make money from it.
However, the most profitable blog niches are often the most difficult to compete in. These are usually the niches that have larger corporations or companies that produce a lot of the content you would be competing against.

Keep this in mind as you create the specific topics you want to write about in your niche. So, rather than choosing a niche purely for its profitability, choose it for its practicality.
Do you see yourself enjoying the topics you write about in your niche?
Any business is a profitable business if you can get your content in front of the right audience.
A great example of this is a craft blogger Jennifer of JenniferMaker.com. She makes around $100,000 a month from her blog. This is more than even some of the more profitable niches.
So, your niche doesn’t matter nearly as much as the high-quality content that you provide to your audience.
You can listen to this podcast from Side Hustle Nation to learn how Jennifer makes so much money from her blog.
2. Choose a Domain Name and a Web Hosting Service
How to Come up With a Great Domain Name
If you don’t know what a domain name is, it’s the URL of your website. It’s not some complicated coding thing. It really is as simple as that.
For me, my website is https://letsmakelifegreat.com/, which means my domain name is letsmakelifegreat.com.
When deciding what you want your domain name to be, you will want to keep your niche in mind.
There are a few methods to deciding what your domain name will be.
- Use a clever name related to your niche
- Use your own name (avoid this if you ever plan to change it)
- Use a memorable name
An example of a domain name for a food blog could be something like DonutsAtDaylight.com.
I recommend keeping it simple. Try not to use a very long name. 4-6 words is kind of the limit most of the time.
If you’re stuck on what to name your blog, you can sometimes use one of your categories to help. That might look something like SallySideHustler.com for a personal finance blog.
⬇️ Pin this for later 📌
You can check to see if your domain name is available when you sign up for web hosting.
You can also check with Name.com and see if your domain is taken or not.
I highly recommend choosing a domain that ends in .com rather than .blog or other endings. Any domain that ends in .org is usually a nonprofit organization, .gov is reserved for government websites.
Why Do You Need a Web Hosting Service?
Web hosting services are like the landlord to your apartment. If you have a terrible landlord, you will have a terrible living experience.
Having a good and reliable hosting provider is what will allow you to not only have a good blogging experience, but a reliable one. Your web host is who keeps your website secure, keeps it running smoothly, ensures fast load speeds, and more.
Similarly, when your readers come to check out your site (metaphorically visit your apartment), they have a great user experience. This user experience is really important for keeping your visitors on your site longer and interacting with your site.
I’ll give you another example of how to keep your visitors on your site longer in a little bit when I talk about SEO.
Knowing that all these factors, good customer service, speed, security, and more, are all important for your blogging experience, it’s time to decide what web host you want to use.
In the next section I’ll go over my recommended list of web hosting services and the best course of action you can take to both save money and get the best experience.
I would, and never will recommend Bluehost, for many reasons which I won’t get into too much detail here. But, I have personally had very bad experiences with them, and so does just about every blogger who uses their services.
If you are curious as to why that is, you can read my review of Lyrical Host, which is the service I switched to. In that review, I explain why I switched from Bluehost, and why you should too.
Related: Lyrical Host Review 2025: #1 Hosting For Bloggers + Discount Code (use code LMLG10 for 10% off your first year or order).
How to Choose a Web Hosting Service
There are several web hosting services that offer a discounted price off of their services for the first year. In addition, they also give you a free domain name as well. While the domain name won’t likely save you much money (only around $20 or so), it is still an expense that you can still save money on.
I highly recommend starting with Siteground as a beginner blogger. This is probably one of the most affordable web hosting services available, for your first year as a blogger. Plus, Siteground offers a free domain name for the first year. This would run at around $36 for the lowest plan, the Startup plan.
For a beginner, you don’t have to have the biggest plan. But I would recommend the mid-tier plan for a couple of reasons.
- The GrowBig tier offers site staging (not available in the Startup tier)
- Allows up to 100,000 visitors per month
While I don’t see most beginners getting quite 100,000 visitors a month within their first year, I won’t say that it isn’t possible. You could be one of these mad lads who just kills it at blogging. And, more power to you.
⬇️ Pin this for later 📌
But the GrowBig tier also gives you a boost in speed and on-demand backups (in case something messes up on your site). These are both very helpful for user experience.
This will cost around $60 for your entire first year with Siteground in the GrowBig tier.
And, when it comes time to renew, if you aren’t comfortable with the renewal cost, I recommend moving to a different host, as you may need upgraded services anyway, depending on your traffic load.
Switching hosts after your first year will help you to save some money with the renewal costs. However, this is totally up to you. If you have had a great experience with Siteground that you don’t want to say goodbye to, then stick with them.
Otherwise, if you need to save some money but still want incredible service, I recommend switching to Lyrical Host. The pricing is 10% off your first year with them using code LMLG10.
The reason I switched to Lyrical Host is that all of their plans offer the same service, but those resources are upgraded with the next plan up. I started with the Tiny Plan which was more than enough for me.
I paid for the entire year which saved me 15%, and then I had another 10% on top of that from using a discount code.
Even though the prices are a little higher, Lyrical Host offers everything you need as a blogger, since it is a service created specifically by bloggers, for bloggers.
Here’s a list of the most recommended web hosting services:
- SiteGround (least expensive, good for a beginner’s 1st year)
- Lyrical Host (has the most comprehensive services, the best customer service)
- BigScoots (best-rated host for pro bloggers, good for high-level blogging, best overall service)
- Recommend using the Shared hosting for smaller traffic, and Managed hosting for higher traffic sites (Shared hosting is around $7-8 a month for the lowest tier)
- Hostinger
- Agathon (great customer support)
3. Set up Your WordPress Site
Setting up your WordPress site for the first time can be pretty overwhelming. What I recommend doing first is spending a little time getting familiar with navigating around your WordPress dashboard.
Once you’ve become a little more familiar with WordPress, you can choose a theme, start building your site, and get your first blog post published.
How to Choose a WordPress Theme
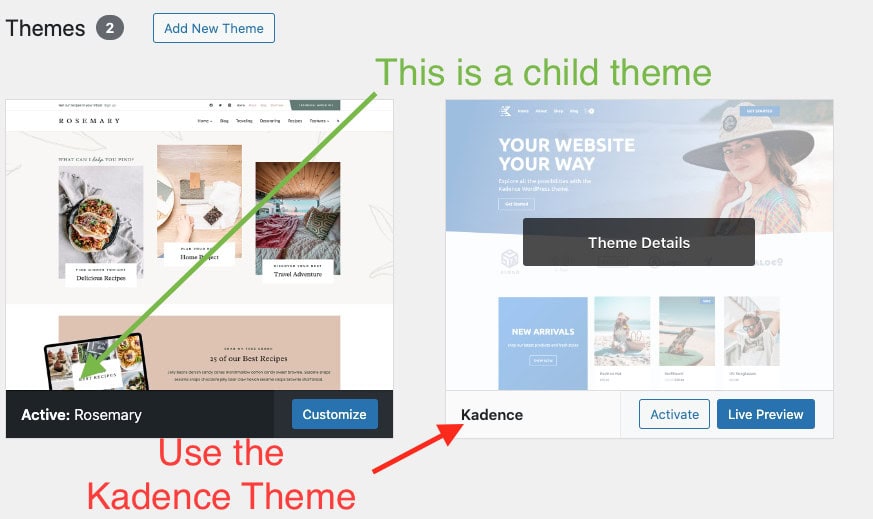
My favorite free theme is Kadence. It is super easy to use, it’s mobile friendly and has great performance. I specifically use a child theme, which I paid for and has pre-made, customized blocks that I can just drag and drop onto my site.
I find that Kadence is probably one of the most beginner-friendly themes available. You don’t have to try and figure out too much about how to use it.
You of course, do need to spend some time playing around with your theme and deciding what you think looks best for your site. But, for the most part, I have found Kadence to be a great theme.
I often get compliments on how nice my site looks. Plus, it’s fairly easy to work with the navigation features.
To choose your theme, go into your WordPress dashboard, navigate to the “appearance” side tab, and select “themes”.
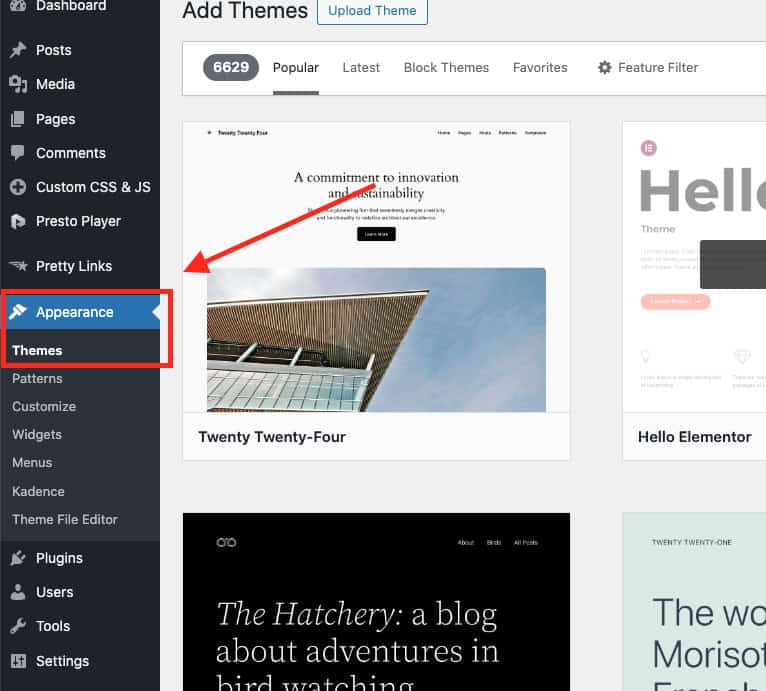
From here, you can look at hundreds of free themes to work with.
I recommend not spending too much time on this (like I did, mistakingly), and just pick one. You can always change your theme at any time. This isn’t a permanent decision.
If you’re not sure, I recommend sticking with the Kadence theme.
How to Customize Your Site
Now that you’ve chosen your site theme, it’s time to customize your look and navigation.
Start by setting up a staging site. You can do this on your own, or you may be able to ask your web hosting service to do this for you.
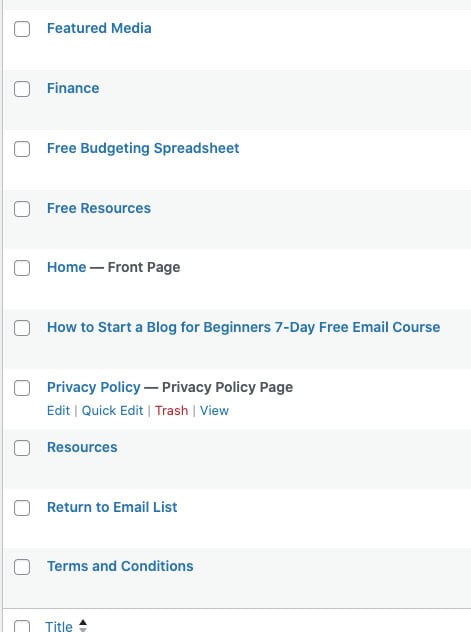
Once your staging site is set up, you can start adding in pages, working on your home page, and more.
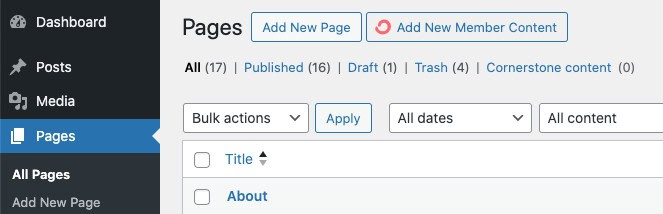
Here are a few pages you will want to make sure are on your website as you customize it.
- Home Page (standard default page all viewers can go back to)
- About Page (all about you, the author!)
- Contact Page (can sometimes be with your About page)
- Legal Pages (learn more about the legal pages you need on your site)
- *Resources Page (a great place to put affiliate links, and freebies)
- *Landing pages (customize landing pages for email opt-ins)
*Optional pages to add to your site. It may be best to add these pages later on in your blogging journey
After creating all the pages you want on your site, it’s time to customize your default appearance and navigation.
Doing this will change the header, footer, and navigation menus throughout your entire site. Each page that you create is its own entity. But when you change the headers, footers, and navigation menus, these will stay consistent, no matter where on your site you are.
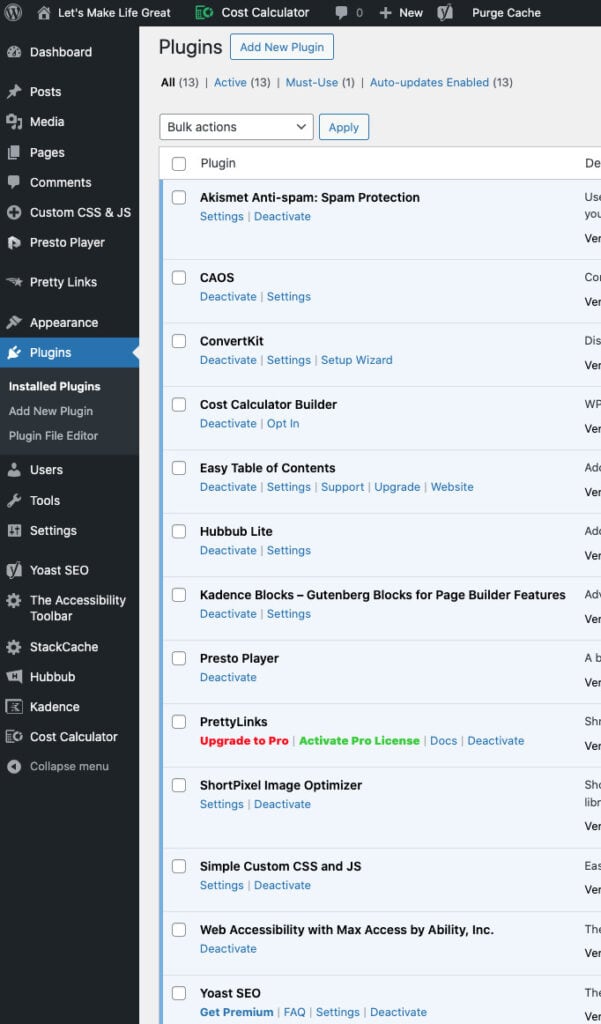
Which WordPress Plugins Do You Need?
There are thousands of plugins that you can use on your site. But, the thing about plugins is that they will take up space, and have he potential to slow down your site.
Not all plugins are equal. Some are better than others, some are free, and some are paid.
Here’s a list of the plugins that I use for my site. There are alternative options to what I have, but so far I have had great luck with these.
Convertkit – Most email marketing services should have a free WordPress plugin you can use. Makes adding in opt-in forms easier.
Yoast SEO – A good free default SEO plugin. Not always the most helpful, but most suggestions should be taken with a grain of salt. Good for creating your permalinks, and meta descriptions.
Kadence Blocks – I use this with my theme. Not all themes require a plugin, but I use this to make customizing my site easier.
Pretty Links – I use this free plugin to mask ugly affiliate links, or lengthy and confusing links. This makes it easier for my audience to click through my links as well.
Hubbub Lite – This is my social sharing plugin. I have Facebook, Pinterest, and Email set up with it. There are dozens of social sharing plugins, so take your pick with this one.
Askimet Anti-Spam – Reduces the amount of spammy comments I get.
Easy Table of Content – I have this in every blog post, so my readers can find my content a bit easier.
Cost Calculator Builder – This is a free calculator plugin that you can use to create formulas. Not necessary for most niches. But, can work wonderfully if you have an online store.
Presto Player – This is a plugin that significantly reduces the size of YouTube videos on your site for faster loading times.
ShortPixel Image Optimizer – This is a free plugin, but is used with a paid service. You can get about 100 free images optimized, but the cost is so low overall, that it is worth it. This helps to significantly reduce the size your photos take on your site.
Web Accessibility with Max Access by Ability, Inc. – This is a plugin that helps keep my site more ADA-compliant. For those with disabilities, they can more easily access my site using this plugin.
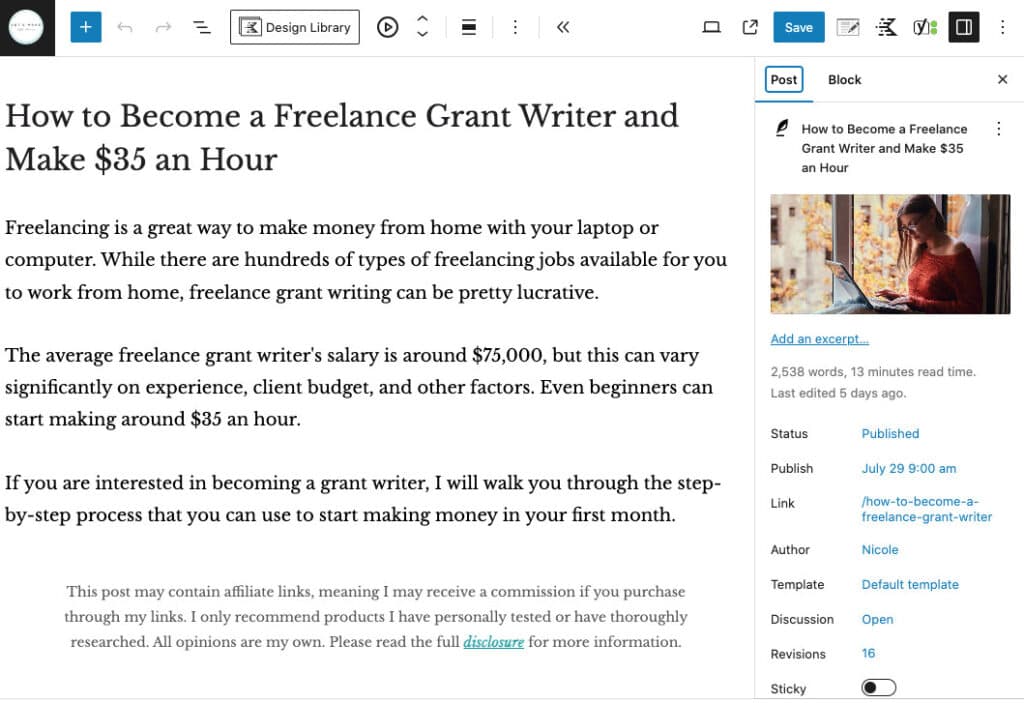
4. Start Writing Your Blog Posts
Now that you’ve customized your website to look the way you want, it’s time to start writing and publishing those blog posts.
Not every blogger would agree with launching your blog without having more posts ready to go. But, the way I see it, the sooner your site is visible to Google, the sooner your site will be recognized and you can get your blog posts ranked.
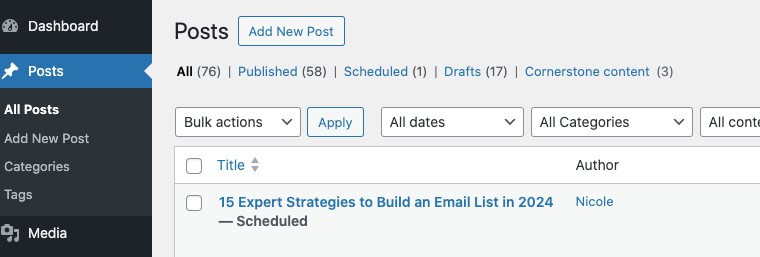
At a very minimum, I recommend having at least 1 blog post already published on your staging site. This allows you to see how your site will look when it goes live. So you can more easily adjust the way you customize your site.
The more you have, the better. And if you do have more, what I actually suggest doing instead of publishing them all at once, is to schedule them out.
If you have 5 or more blog posts ready to go, publish your first 2-3, and then schedule the rest to publish once a week. That way you can get ahead on content creation, and you’re not struggling to write your blog posts.
Write for Your Audience First
This applies to all entrepreneurs, and bloggers are no exception. When you create content for your business or blog, it needs to align with the needs of your target audience.
If it does not, they will not engage with the content you worked so hard to create.
So, instead of finding an audience for your content, write content for your audience.

If you’re not sure who your target audience is, consider the niche you chose. What topics will you be writing about? Who is most likely to read your content? What problems are you solving?
And, no matter what your niche is, you should always create high-quality content. This not only shows that you care about your audience but proves to Google that you have authority in your niche. More on meeting Google’s needs in a second.
Your audience wants to learn from you because you have a unique perspective. Make sure that your writing has plenty of your voice. This gives your content a ‘real feel’.
So, when you write for your audience first, you should write like you are talking to them. Like you’re having a conversation.
Ask a question every once in a while to show your audience that you know what their struggles are.
Do you see what I mean? Just like that.
Make your content easy to read. Your writing should be easy to scan, and your audience should want to continue reading your entire post. Rather than going back to Google search results because your ads scared them away, or you didn’t actually tell them what they needed to find out.
⬇️ Pin this for later 📌
Use Search Engine Optimization to Rank
Once you’ve written great content that your audience wants to read, it’s time to make sure that you use SEO so Google understands your post too.
SEO, or search engine optimization is something you will start hearing about all the time as a blogger.
According to Google, there are over 200 factors that affect ranking factors. While there is no way that we can keep up with all of these, there are a few that we can make sure we do well.
- Use the most relevant keywords in blog posts
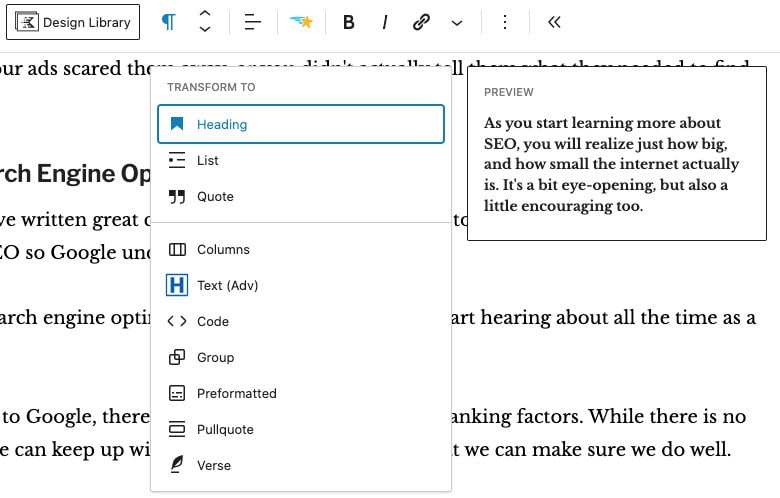
- Use H2 and H3 headings to organize our blog post
- Use bullet points, and numbered lists to organize posts (like this one here!)
- Use images with ALT text to tell Google and others what the image is about
- Use linking (internal and external) to provide context so Google knows what your content is about
- Get comments on your posts so Google knows people trust you as a source
- Encourage readers to stay on your site longer to show Google they enjoy your content
- Get backlinks (when others link from your site to theirs) to show Google you have expertise and authority
There are dozens of other things you can do to improve your SEO and increase your search rankings. But, for now, focus on writing great content. The rest will come with time.
If you’re curious, here’s how Google ranks search results.
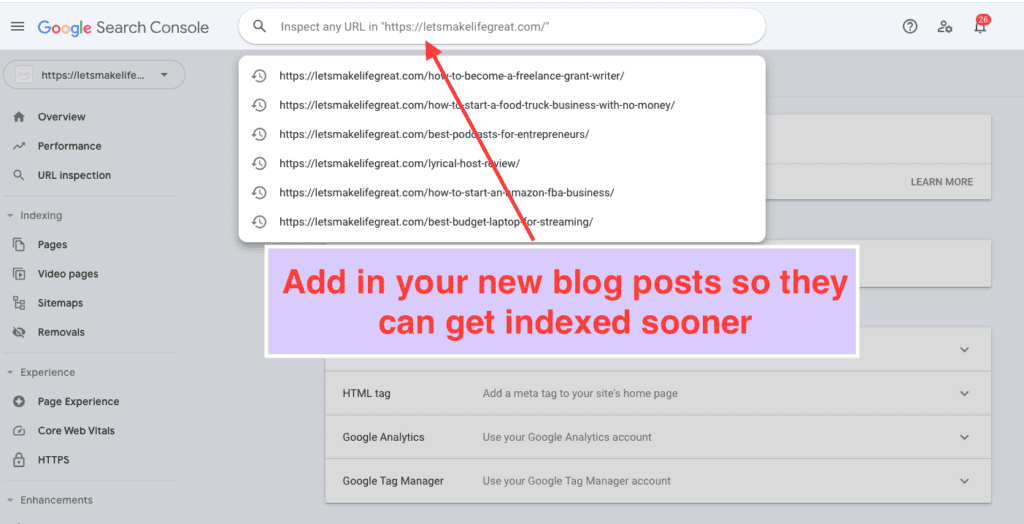
You can use Google Search Console to index your blog posts faster.
How to Use SEO in Your Blog
As you start learning more about SEO, you will realize just how big, and how small the internet actually is. It’s a bit eye-opening, but also a little encouraging too.
Before you start spending hours writing a new blog post, you will want to spend a little time doing some keyword research.
I have actually minimized the time it takes me to do keyword research using a tool called RankIQ. I highly recommend you consider trying it earlier on in your blogging journey.
There are also other free tools that I recommend. Most are Google extensions you can use. Here’s my top 2.
- Keywords Everywhere (free version, but also has paid credits that are very affordable)
- SEO Quake (allows you to see some backlinks and other ranking results)
Keywords Everywhere is by far the best Chrome extension. You can also use this with Pinterest, and even YouTube. There is a free version, but the paid credits are 100% worth it. It’s like maybe $1-2 a month.
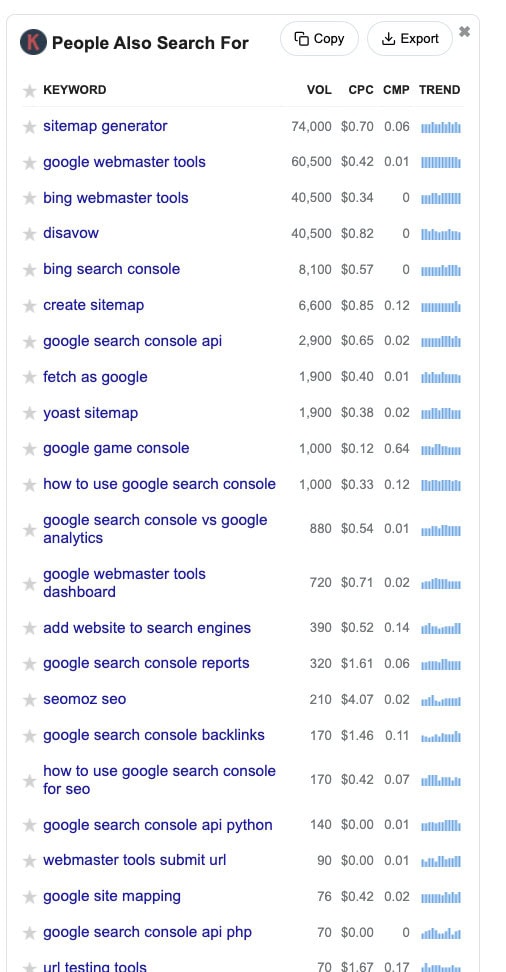
While you don’t have to use a ton of tools to do well with blogging, Keywords Everywhere has allowed me to find high-search keywords and topics to write about. So I know that I’m writing content that my audience actually wants to read.
This is also how I know which keywords will rank best on Pinterest while I do Pinterest keyword research.
While keyword research is one of the biggest SEO factors, user experience is also incredibly important.
Related: RankIQ Review: The Best SEO AI Tool For Bloggers To Rank (2025)
Giving Your Readers the Best Experience
User experience is a pretty big factor in SEO. Remember earlier how I mentioned that web hosting services are like the landlord to your apartment?
Well, here’s another metaphor for user experience.
Imagine you have a reader, or a guest, come to visit your site. Now, imagine that you have it chock full of ads they can’t seem to get rid of. Your ads are like nonstop barking dogs to your visitors.
Most people are usually okay with a few dogs hanging around for extra pets, but when the dogs start barking, or otherwise pestering your visitors, they are more likely to leave sooner. Now I love dogs, and just about any furry creature, but we all get a little annoyed at certain behaviors right?
This is how your visitors often feel when they visit your site. If they get overwhelmed with a bunch of bothersome ads, they’ll probably leave almost right away.
Keep this in mind as you build your site, and start monetizing.
Here are a few tips to improve your user experience:
- Use highlighted links to the most relevant content that will help your reader solve their problems
- Offer your most recommended resources to solve your reader’s problems (even if you don’t get paid to do so)
- Remove annoying ads, and reduce the ad levels for better site function
- Make sure your site speed has adequate loading times
- Make sure your fonts, colors, and images are clearly visible and easy to see
- Remove annoying pop-ups (or force them to load after a certain time)
- Write your content so it is easy to scan
- Utilize white space and reduce paragraph length (1-3 sentences is best, or no more than 4-5 lines on mobile view)
⬇️ Pin this for later 📌
5. Build Site Traffic and Monetize
So, you’ve created a great-looking site. You’ve published some blog posts. And, you’re ready to start making money.
Awesome!
Congratulations on making it this far. Or at least reading this far. This is a big step towards your blog’s success.
Now, it’s time to start bringing in some traffic and monetizing your site. I don’t want you to have super high expectations with this, because everyone’s journey looks different.
Every niche and every site is a little different, so don’t compare yourself to other bloggers too much. This can often be discouraging, and you’ll want to quit before you get a chance to reap the rewards.
Instead, use the vast experience and knowledge of other bloggers to encourage, help you improve, and inspire your actions.
And, speaking of actions, make sure to follow these steps to help you get traffic so you can make those first sales, and ad income.
Related: Honest Review of Pinteresting Strategies by Carly – 2025
Diversify Your Traffic Sources
The unfortunate truth about getting Google traffic is that this will take time. It’s just how the process works, and how the cake crumbles. Naturally, it can take anywhere from weeks to even years to rank on Google for keywords.
The more competitive the keyword, the harder it is to rank. This is why you will want to strive to rank for multiple keywords per post. Both, short-tail and long-tail keywords.
But, you also want to diversify your traffic sources too. Because you never want to be at the mercy of losing all your traffic to a single algorithm change. If you diversify your traffic, like you would an investment portfolio, you can better avoid the volatility of change.
To do this, you will want to join social media platforms (whichever ones you prefer most), build an email list, open a Pinterest account, post to forums,
You can increase your page views simply by having your content all over the internet. Like confetti.
If your blog post links are spread all over the internet like confetti, this increases your page views as well as your authority.
You can see where your traffic is coming from in Google Search Console.
Making sure your blog content is visible in as many places as possible helps protect your site from algorithm changes.
Most recommend traffic sources:
- Google, Bing, Yahoo, Duck Duck Go, etc. (any search engine)
- Pinterest (a great option for bloggers, though not suitable for all niches)
- YouTube (great for affiliate marketing, ads, and some traffic)
- Facebook, especially Facebook groups (best if you make your own)
- Instagram (not my top favorite, but great for those who enjoy working with it)
- Forums (Reddit, Quora, etc.)
Related: 14 Ways to Skyrocket Your Blog Traffic on Pinterest in 2025
Use Tools to Build Blog Traffic
I previously mentioned that Keywords Everywhere is one of the best free tools that you can use. And, while the free tools can be helpful, there are some paid tools you will definitely want to consider.
There are hundreds of online tools you can use to help you build traffic. But, I will only mention the ones that I use and have found the most helpful.
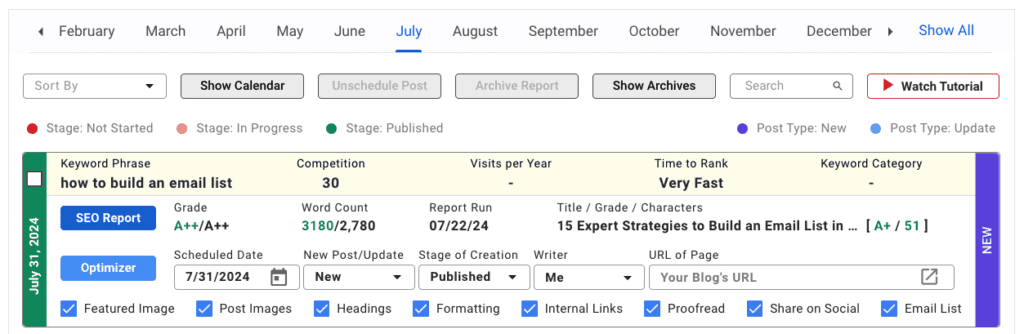
My top favorite tool, is a paid tool called Rank IQ. This is an SEO tool that you use to find the best keywords to rank for when writing a blog post. It’s actually the tool I’m using to write this blog post right now.
This image shows you what the tool looks like. A little confusing at first glance, but very easy to use once you know how to navigate. It is actually one of the easiest tools I have used, and is probably the best.
Rank IQ is also one of the most value based tools you can use as well. You won’t be able to compare too much to your competitors, but, you will be able to write great SEO posts using this tool.
Each report, or one blog post, costs around $3.50 a piece. Considering this tool has saved me hundreds of hours of keyword research, I would say it is well worth the price. I use the lite membership which is just 8 reports a month.
Rank IQ has also improved my long-term success by helping me rank for more terms than I would have without it. Not only has it increased my page views, but many of the other members in RankIQ have been able to withstand months and years of updates, and still ranked well in search results.
I was able to rank one of my blog posts in as little as two weeks.
There are other paid tools you can use to help with your blogging journey. They all have free versions, and paid memberships. As a beginner, the free version is usually more than enough for your needs.
- Moz (most helpful to check your DA, backlinks, competitors, and a little keyword research)
- Semrush (tracking keywords, backlinks, internal/external links – not my favorite tool)
- Google Search Console (this is a free tool, allows you to request new page indexing, and monitor your sites performance)
- Google Trends (find the top trending queries on Google so you can stay on top of what your audience wants)
- Bing Webmaster (another search engine indexing tool – highly recommend using this tool as well since it’s free)
- Uber Suggest (not my favorite tool, but easier to navigate and understand – great to check backlinks, and keyword analysis)
How to Monetize Your First Blog
There are dozens of ways for you to monetize your blog. No matter what your method is, you will need some traffic to help get you there.
As a beginner, I recommend affiliate marketing, email marketing, and YouTube. Having a YouTube channel can be something you work up towards later in your blogging journey, and is optional. However, it is an excellent way for you to monetize and build up your brand and authority.
Affiliate Marketing – Perfect for any level of blogger. Allows you to easily drop in your affiliate links into blog posts, YouTube videos, your email broadcasts and more.
Email Marketing – This is something that all entrepreneurs should have. You can sell affiliate products and your own products with your email. Also has the highest ROI of any marketing method.

Ad Income – More profitable if you have more traffic. I don’t recommend using Google Adsense as they hardly pay anything, but can be a good default if you really want to give ads a try.
Online Courses – An excellent way to make income, even outside of your blog. Can help supplement and diversify your income streams, and is usually less reliant on algorithms. Plus, it places you as an industry expert in your niche.
Digital Products – This can be Ebooks, printables, templates of any kind, spreadsheets, and any product that is sold and delivered digitally. I often consider digital courses and digital products to go hand in hand.
As you are building your blog, I highly recommend you start with email marketing and affiliate marketing in the beginning. These two are usually less work than creating a product. But, they also allow you to test different things with your audience.
Your email list is a great place to sell to, after you nurture your list of course. But, it is also a great place for you to see what your audience wants, likes and more. Just ask them in the next email you send.
Final Thoughts on How to Start a Profitable Blog
Starting a blog is a bit tricky at first. There is a bit of a learning curve, and there are always new things to learn about blogging. It is an ever-evolving way to make money. But, few other jobs offer the kind of freedom that blogging provides.
Blogging is not always easy, but I absolutely love doing it. I love writing content and helping people to make money through side hustles, and even to start a blog like I have.
I want to teach new bloggers how to succeed and start making money so they can quit a job they hate, supplement their income to support their family, or whatever their reasons may be.
If others are succeeding by following my recommendations and instructions, then it means that it works. And that means that I am making a difference in people’s lives.
Related Articles
- Convertkit vs MailChimp: Which is Better for Bloggers (2025)
- How to Start a Blog for Beginners 7-Day Free Email Course
- 14 Ways to Skyrocket Your Blog Traffic on Pinterest in 2025
- Lyrical Host Review (2025): #1 Hosting For Bloggers + Discount Code
- RankIQ Review: The Best SEO AI Tool For Bloggers To Rank (2025)
- 16 Best Legal Pages for Websites: Blog & Business Must-Haves
- 15 Best Podcasts for Every Bloggers Needs in 2025
- 22 Best Podcasts All Entrepreneurs Need in 2025
- 13 Best Ergonomic Home Office Chairs for Lower Back Pain 2025
Great content I really enjoyed reading this. I have just started my blog and I’m doing some affiliate marketing so it was very helpful for me.
Wonderful! That’s so great to hear that you started blogging already. It’s such a fun and rewarding venture. If you’re struggling with Affiliate Marketing, I highly recommend a couple different courses that may help.
Here’s the link to those two courses.
https://letsmakelifegreat.com/affiliate-marketing-for-bloggers
https://letsmakelifegreat.com/Making-Sense-of-Affiliate-Marketing